
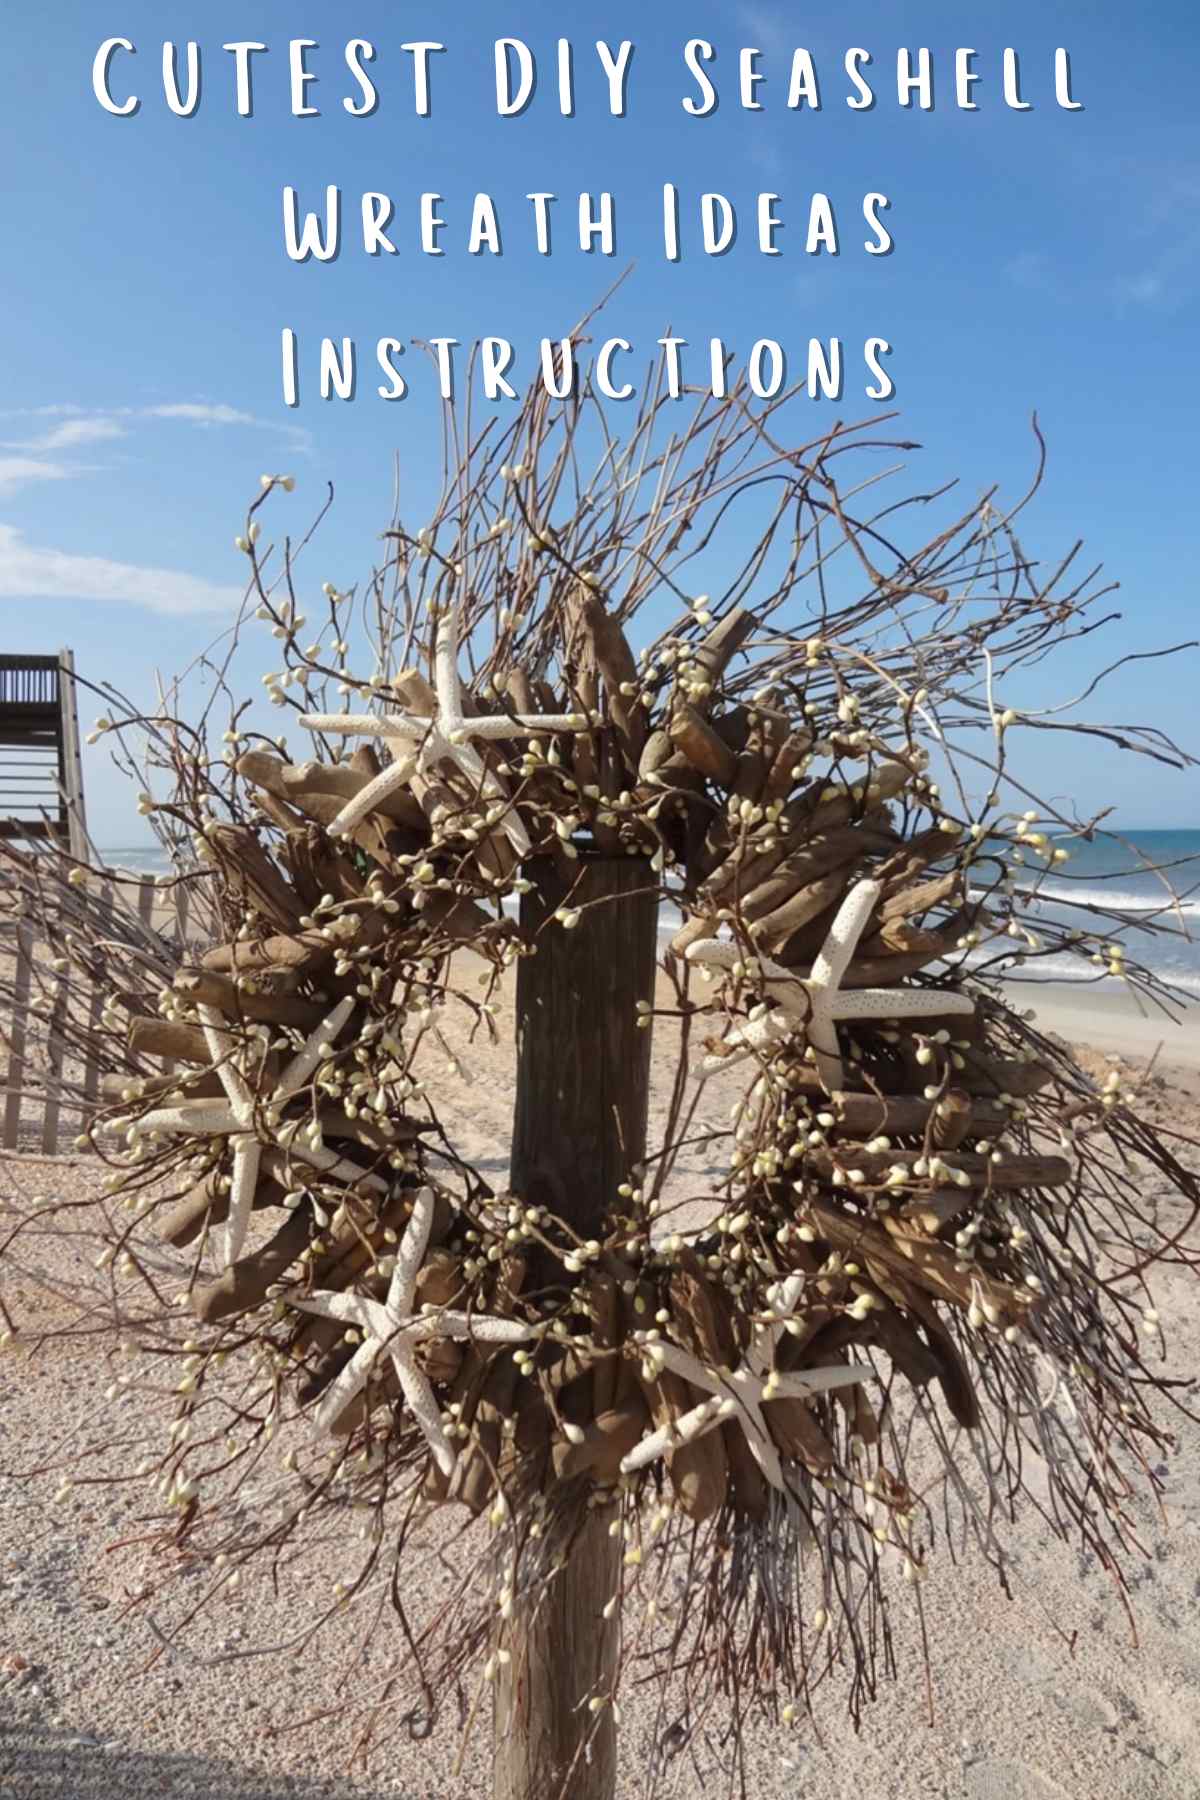
Breathtaking DIY seashell wreath ideas and instructions that even land lovers can understand.
I have been pretty obsessed with all things ocean lately. After a LOT of trial and error, I have finally found the perfect way to combine two of my favorite things: the ocean and DIY wreaths!
I have created to CUTEST DIY seashell wreath that is going to sit perfectly on my front door.
Now, I could have stopped here… but I wanted to share with you how I did it so that you could make one too, and then we could match!
After all, creating a DIY seashell wreath can be a fun and creative project that will add a touch of coastal charm to your home decor, so why not go for it?
Seashell Wreath Inspiration
Before I get into my tutorial, I wanted to give you some visual ideas on what you can get your seashell wreath to look like. I love that natural feel that these wreaths have; though different, they actually remind me of my boxwood wreath DIY.
10. Dried Blue Driftwood Wreath
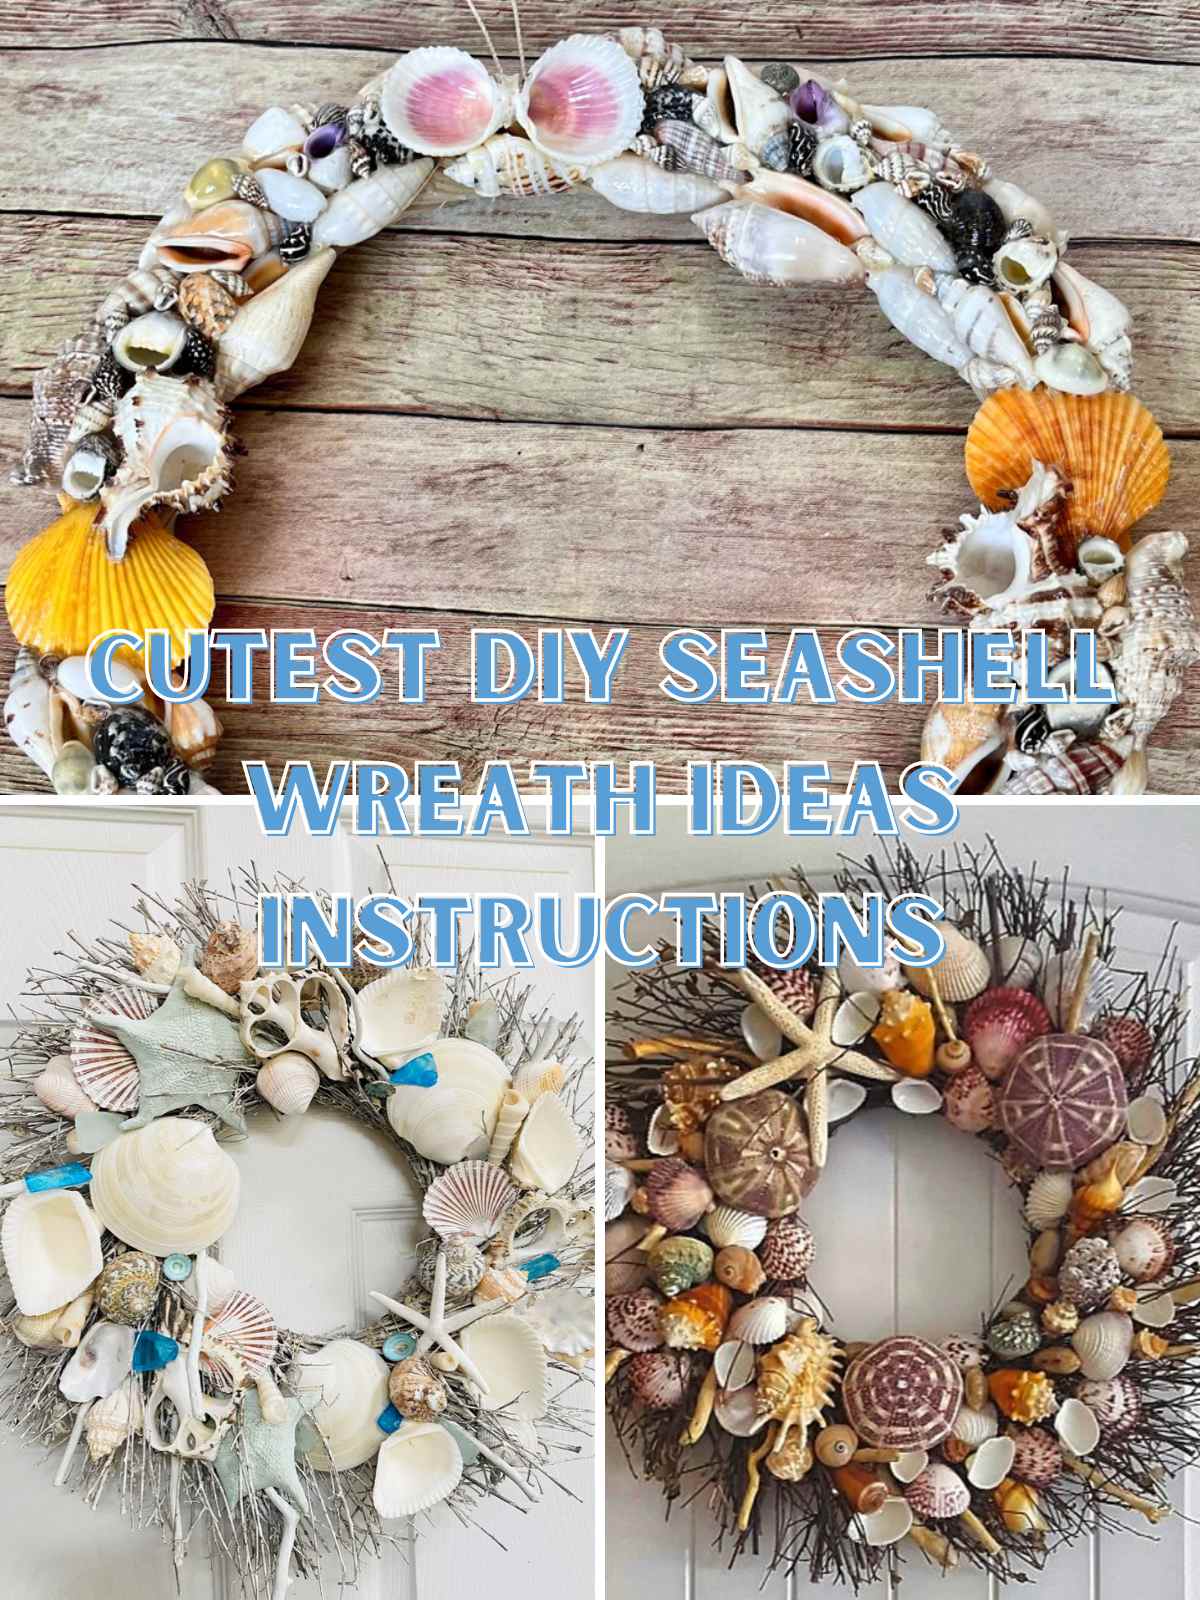
CUTEST DIY Seashell Wreath Ideas Instructions
I don’t know about you, but I like to really set the scene when I am getting into the crafting mindset. Sure, you could just throw everything on the table and get started, but in my opinion, that is no way to live!
So take a couple of extra minutes to really set yourself up for success. Light a candle, make your seat comfy, and put on a podcast or maybe some music! This is the perfect craft to add to my list of summer wreath ideas. Let’s do this thing.
Materials you’ll need:
- Wreath base (e.g., foam, straw, or wire wreath form)
- Seashells in various sizes and shapes (collected from the beach or purchased from a craft store)
- Hot glue gun and glue sticks
- Decorative items (optional, such as starfish, sand dollars, or small sea glass pieces)
- Ribbon or twine (for hanging)
DIY Seashell Wreath Ideas Instructions – Step 1: Prepare Your Seashells
It’s time to prepare your seashells. If you collected the ones you will be using at the beach, chances are they are covered in grim.
So you are going to want to clean the seashells thoroughly to remove any sand, dirt, or debris. Otherwise you risk the glue not taking, and that is a whole mess you don’t want to be a part of. You can rinse them with water, but make sure they dry completely before use.
Step 2: Arrange the Wreath Base
If you are using a foam or straw wreath form, you can leave it as is. However, if you have a wire wreath form, consider wrapping it with ribbon or twine to give the shells a better surface to adhere to. I have made this mistake before, and it cost me a few hours of my life…and a bag of good shells.
To do this, secure the end of the ribbon or twine with hot glue, then wrap it around the wreath form, making sure to cover the entire surface. Secure the other end with hot glue as well. Give it a good shake to make sure everything is as secure as possible.
That might seem like a silly little step…but let me tell you, it’s IMPORTANT.
DIY Seashell Wreath Ideas Instructions – Step 3: Set Your Arrangement
Before gluing the shells, arrange them on the wreath base to get an idea of how you want the final design to look. I like to do this because I tend to be an overly confident person. I think I can totally just go off of what is in my head, but then it never goes as planned.
Plus, there are so many awesome designs you can use. You can create a symmetrical pattern, a random arrangement, or a mix of both. Once you’re satisfied with the arrangement, take a picture as a reference if needed.
Step 4: Attach Your Shells
Now the fun can begin. Start gluing the seashells onto the wreath base one by one. Apply hot glue to the backside of each shell and press it firmly onto the base. Be careful not to burn yourself with the hot glue, though, I have spent plenty of time bandaging little glue burns, don’t be like me!
Work your way around the wreath, following your planned arrangement until the entire thing is covered.
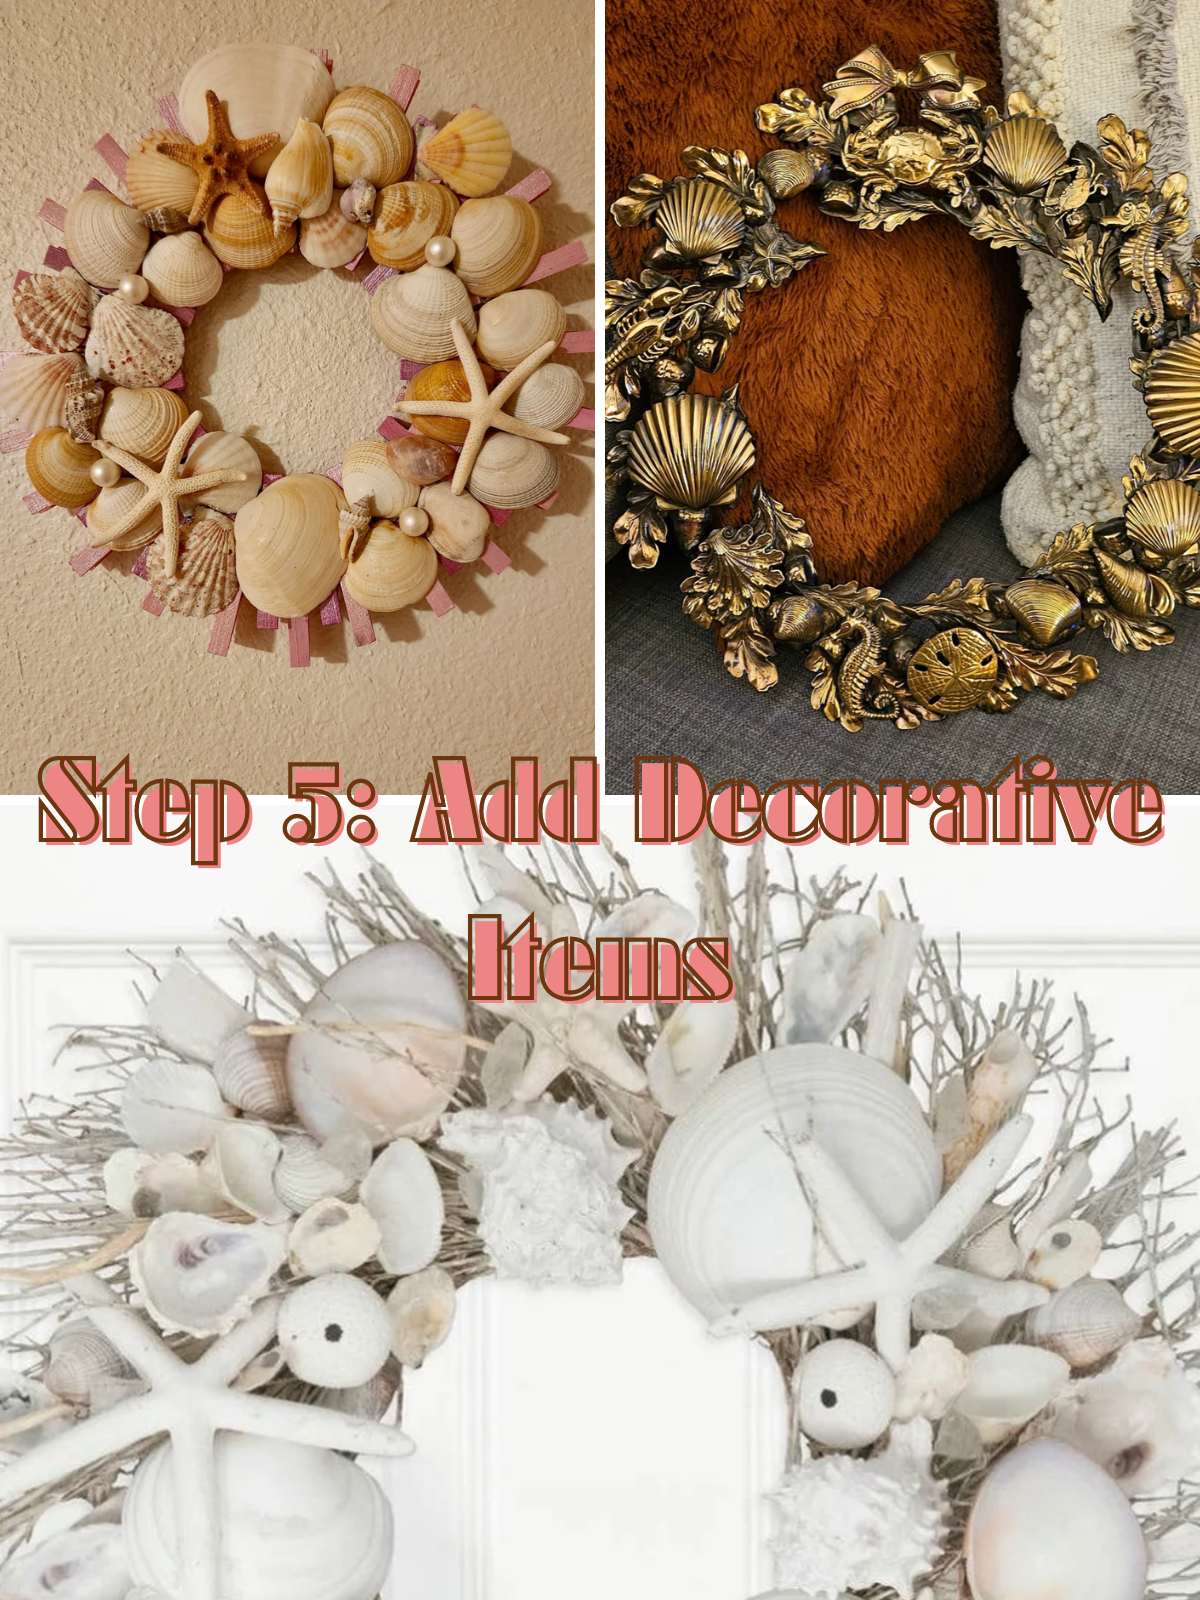
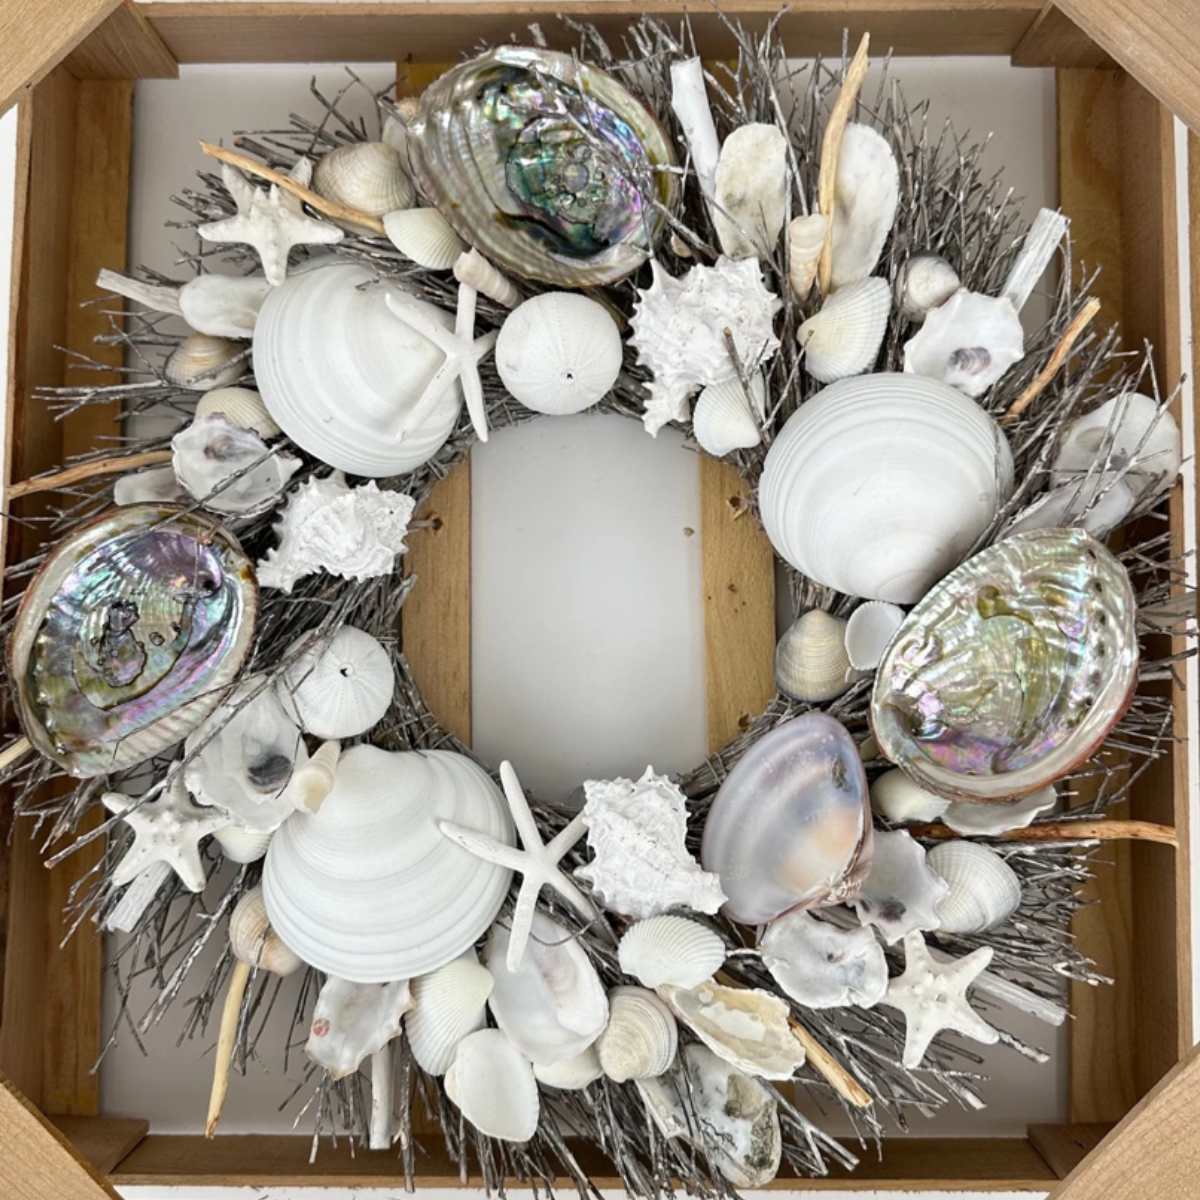
Step 5: Add Decorative Items
If you have additional decorative items like starfish, sand dollars, or sea glass, glue them onto the wreath, filling in any gaps between the seashells. This step is optional, but it can add extra charm to your wreath that would otherwise be left out.
I like to add as many little decorations as I possibly can, because a full wreath is a happy wreath.
Step 6: Let It Dry
Allow the wreath to dry completely before handling it or hanging it up. This will ensure that the seashells are securely attached, and you won’t be left in tears after your hard work hits the floor.
Does it sound like I am speaking from experience? Yeah, that is because I am. I got way to excited to see it all hung up, and it cost SO many shells.
DIY Seashell Wreath Ideas Instructions – Step 7: Create a Loop
I like to add a simple loop of ribbon to act as the hanger for this project. To do this, measure out about a foot to a foot and a half of a ribbon in your color of choice. Then you are going to take this ribbon and tie it around the top of your wreath.
Make sure that it is tied securely; you don’t want your wreath falling to the floor. Especially when shells are involved, otherwise, you will have a pile of broken sea dust on the floor.
Step 8: Hang It Up
Find the perfect spot in your home to hang your beautiful seashell wreath and enjoy the coastal vibe it brings to your decor!
Remember, the best part of a DIY project is that you can get creative and make it your own. Feel free to experiment with different shell arrangements, add additional decorations, or even paint the shells if you want a pop of color. It’s all about you!
I hope you loved my shell wreath tutorial; I had nearly as much fun writing this as I did when I was creating it.
Making wreaths has really been such a fun thing for me to do in my free time, and it makes me happy to think that we have that in common.
If you are looking for your next project, then I think you need to take a look at this decomesh summer wreath tutorial!