
Inside: Coolest Ikea Kallax bed hacks that are both adorable and affordable.
I am not sure about you, but I am always here for a good deal. Life can be so expensive, especially when it comes to decorating your homes. Must have furniture like couches and bedframes can cost an arm and a leg, so I try and save myself some cash whenever I can.
I recently discovered a bedframe hack that literally blew my mind, so naturally, I came here to share it with all of you! If you are someone like me who needs any extra organizational space, you can get…then these Ikea Kallax bed hacks are for you!

It’s literally so simple, and way more affordable than if you were to try and order a bed frame with a similar style or storage capabilities. I go over everything you need to know and more below. Ikea hacks have been my latest obsession, check out my last one: Ikea Alex Desk Hack.
Table of Contents
What Are The Ikea Kallax Bed Hacks
Essentially, the Ikea Kallax bed hacks are ways that you can use simple cube shelves(like the ikea kallax shelves) as a solid foundation for your bed. Then you not only have a cute elevated frame, but you have even more storage space.
Here is what you will need:
- 3 Kallax Shelves
- Support Beams
- Drill
- Screws
- Plywood from Home Depot or Lowe’s
Once you have these, you can get started with my tutorial below! There is much more where this came from as well, such as the Ikea Mirror Hack.
Ikea Kallax Bed Hacks
Alright, so first, I want to go over the basic Ikea Kallax bed hacks that you can follow to create your bedframe. Then once you have your solid foundation, you can go further with your space to create something that is more you!
Step One: Choose Your Design
Decide on the type of bed you want to create using the Kallax shelves. I tried to consider factors such as the size of the mattress, the amount of storage I would need, and any additional features I would want to incorporate.
You can stack the shelves two rows high for an elevated look with more storage space, if that is what you need. I wanted to create a little hangout area under my bed, so I did this but I left the end open so I could crawl in for little movie nights.
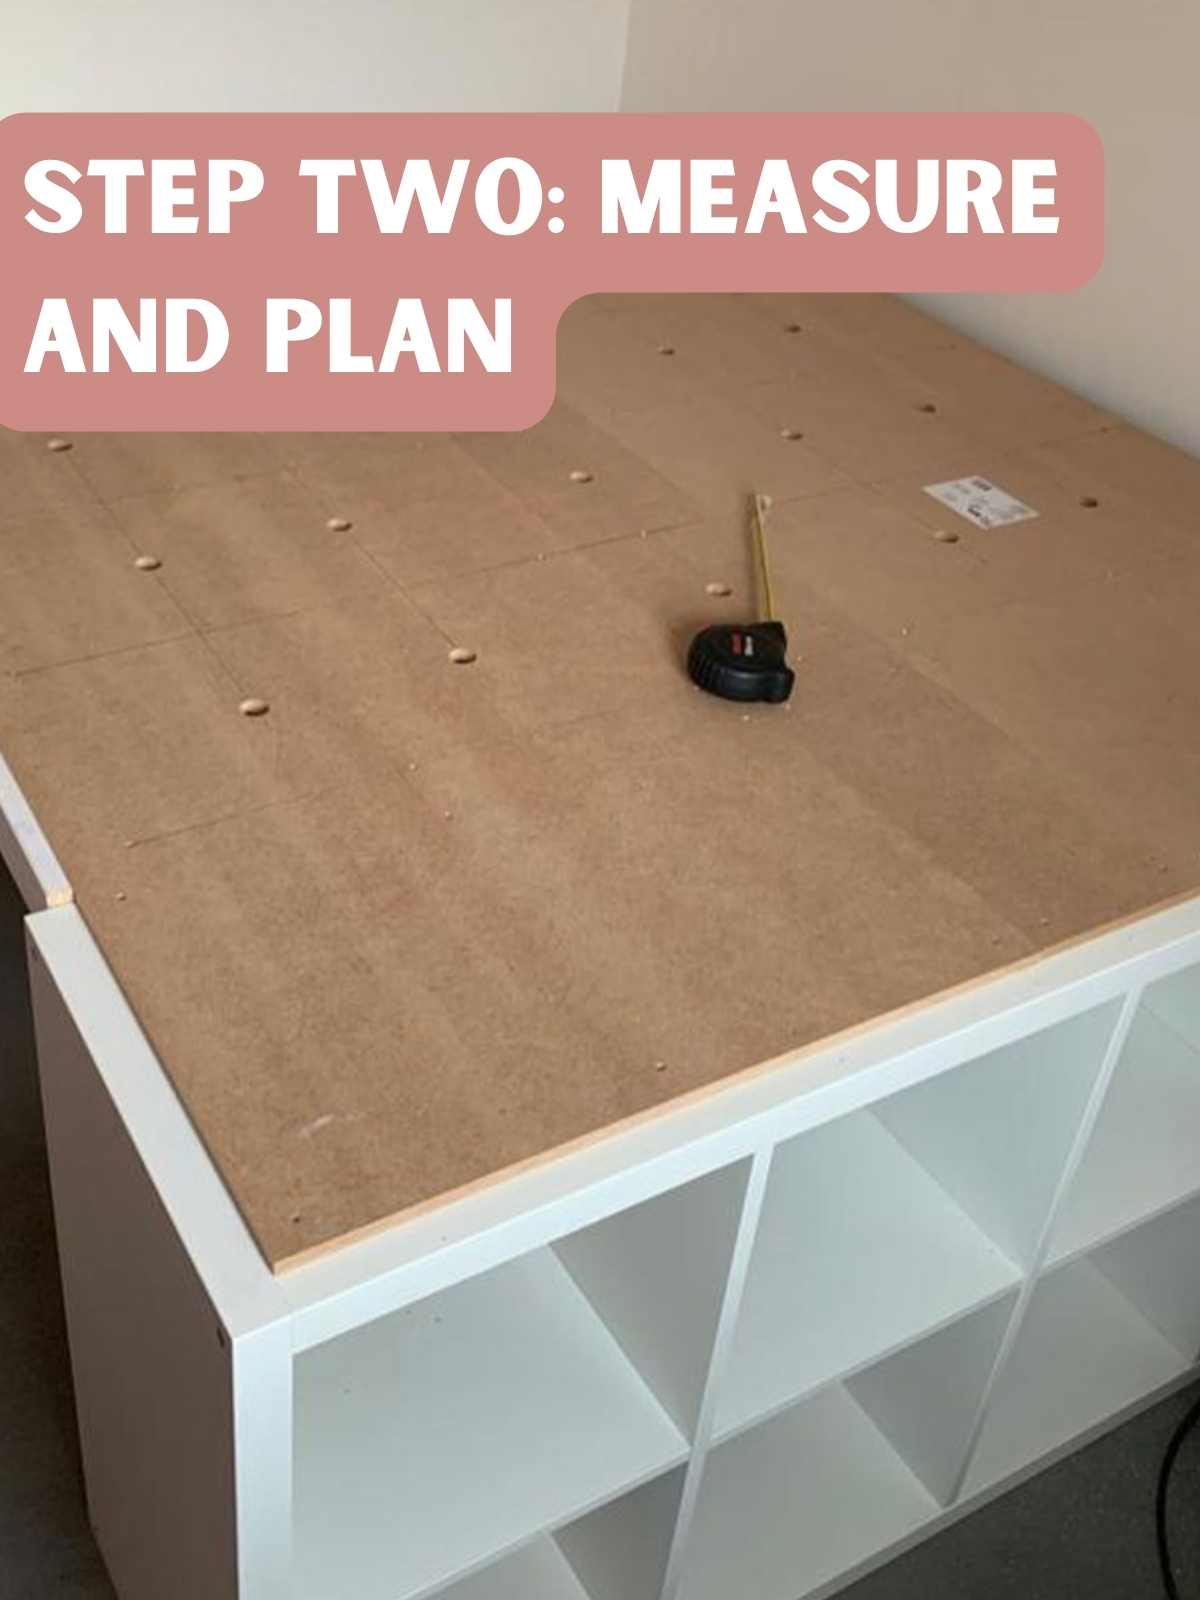
Step Two: Measure and Plan
To me this is the most boring part of the entire DIY. You have to measure your space and the dimensions of the Kallax units to ensure a proper fit. Plan the arrangement of the shelves and any modifications you’ll need to make, such as attaching hinges or adding support.
This is essentially full planning mode.
Step Three: Assemble Kallax Shelves
Now comes the fun part, I mean it when I say you need to put on some music or a podcast…this could take a while. Follow the instructions provided by IKEA to assemble the Kallax shelving units. If you’re altering the units, such as attaching them to each other or the wall, make sure you do so securely.
The first time I did this, I thought I could get away with just putting them all together. The problem was that my bed was in the center of my room…not the corner. So it had no extra support and I found myself endlessly shifting it back to its proper position.
Step Four: Create the Bed Frame
Depending on your chosen design, you might place the Kallax units horizontally or vertically to form the base of the bed frame. You can stack them, arrange them in an L-shape, or position them along the sides of the mattress.
Step Five: Add Support
Depending on the weight of the mattress and occupants, you might need to add additional support to ensure the bed frame is stable and safe. This could involve reinforcing the Kallax units or adding additional legs or braces.
I added these to the materials list. You can find them for cheaper than that, but I know that brand is good quality.
Step Six: Mattress Platform
Create a stable and comfortable platform for the mattress to rest on. This could involve placing plywood on top of the Kallax shelves, or you could customize the units themselves to create a solid surface.
Step Seven: Finishing Touches
Paint or decorate the Kallax units to match your room’s aesthetic, and add any finishing touches to complete the look of your customized bed. This part is all you! And coincidentally…it’s my favorite.

Ikea Kallax Bed Hacks: Cutest Additions
Now that you have laid the framework (literally), you can start making some upgrades if you like! If you are happy with where your bed ended up then that is totally okay. I would still recommend checking these out though, they are epic.
Ikea Kallax Bed Hack: Loft Bed
Stack Kallax units to create a lofted bed. You can place a mattress on the top platform and use the lower shelves for a desk, storage, or even a cozy seating area. I love this because it makes the most out of small spaces.
Ikea Kallax Bed Hacks: Daybed
Arrange Kallax shelves in an L-shape or U-shape to create a daybed with a backrest. Add a mattress on top, and you’ve got a comfortable lounging and sleeping space! How cool is that?
Kallax Bed with Storage Drawers
Incorporate drawers into your Kallax bed by attaching them to the shelves. These drawers can be used for clothing, linens, or other items, keeping your bedroom clutter-free. You can find super cute cubby drawers on Amazon! I went for these.
Ikea Kallax Bed Hacks: Canopy Bed
Attach curtain rods or fabric panels to the Kallax units to create a canopy effect over your bed. This can add a touch of elegance and coziness to your sleeping area.
Ikea Kallax Bed Hacks: Bunk Bed
Stack two or more Kallax units vertically to create a bunk bed. This is a great solution for kids’ rooms or when you need extra sleeping space for guests.
Ikea Kallax Bed Hacks: Headboard
Use a single Kallax unit as a headboard for your bed. You can keep books, decor, or essentials within reach while creating a stylish focal point in your bedroom.
Ikea Kallax Bed Hacks: Bed Bench
Position a Kallax unit at the foot of your bed to act as a bench with storage. You can place cushions on top for seating and use the shelves to store shoes, blankets, or other items.

I am sort of still in awe of this amazing hack. All of this for a fraction of the price you would be paying had you just gone ahead with the cheapest bedframe you could find that included this level of style and storage capabilities. I have such a saver’s rush right now!
So I hope that you enjoy putting together your new bedframe and sprucing it up to fit your vibe. I would recommend that you listen to a podcast or your favorite album while you do this; that way, you make the process even more fun!
I am just scratching the surface of Ikea hacks. There are so many more that the internet has to offer. If you are intrigued, then check out this Ikea coffee table hack!