
Inside: Simple Ikea mirror hack that will transform your home on a budget.
Have you heard of the latest TikTok trend? It’s an Ikea mirror hack that is much more affordable than the one in the store! I think we have all seen(and obsessed over) the large industrial mirror.
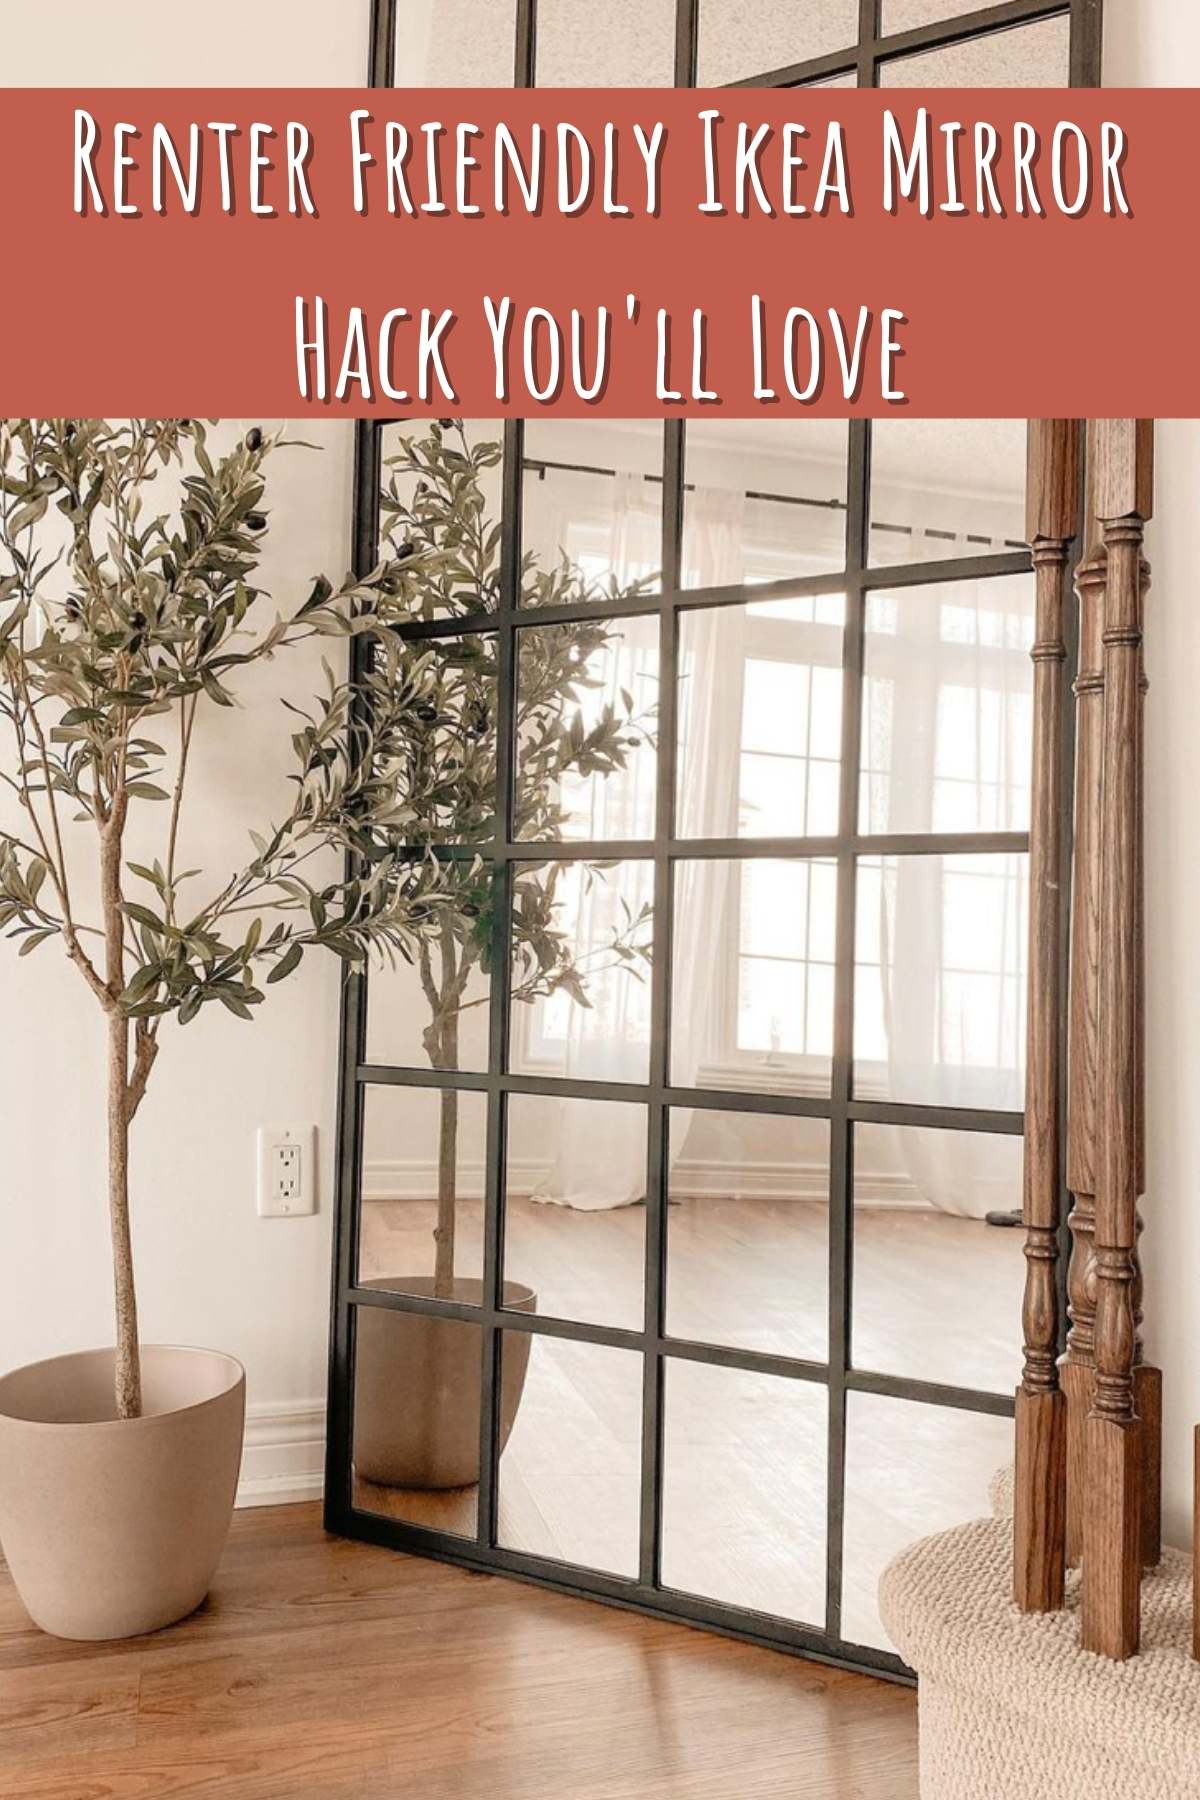
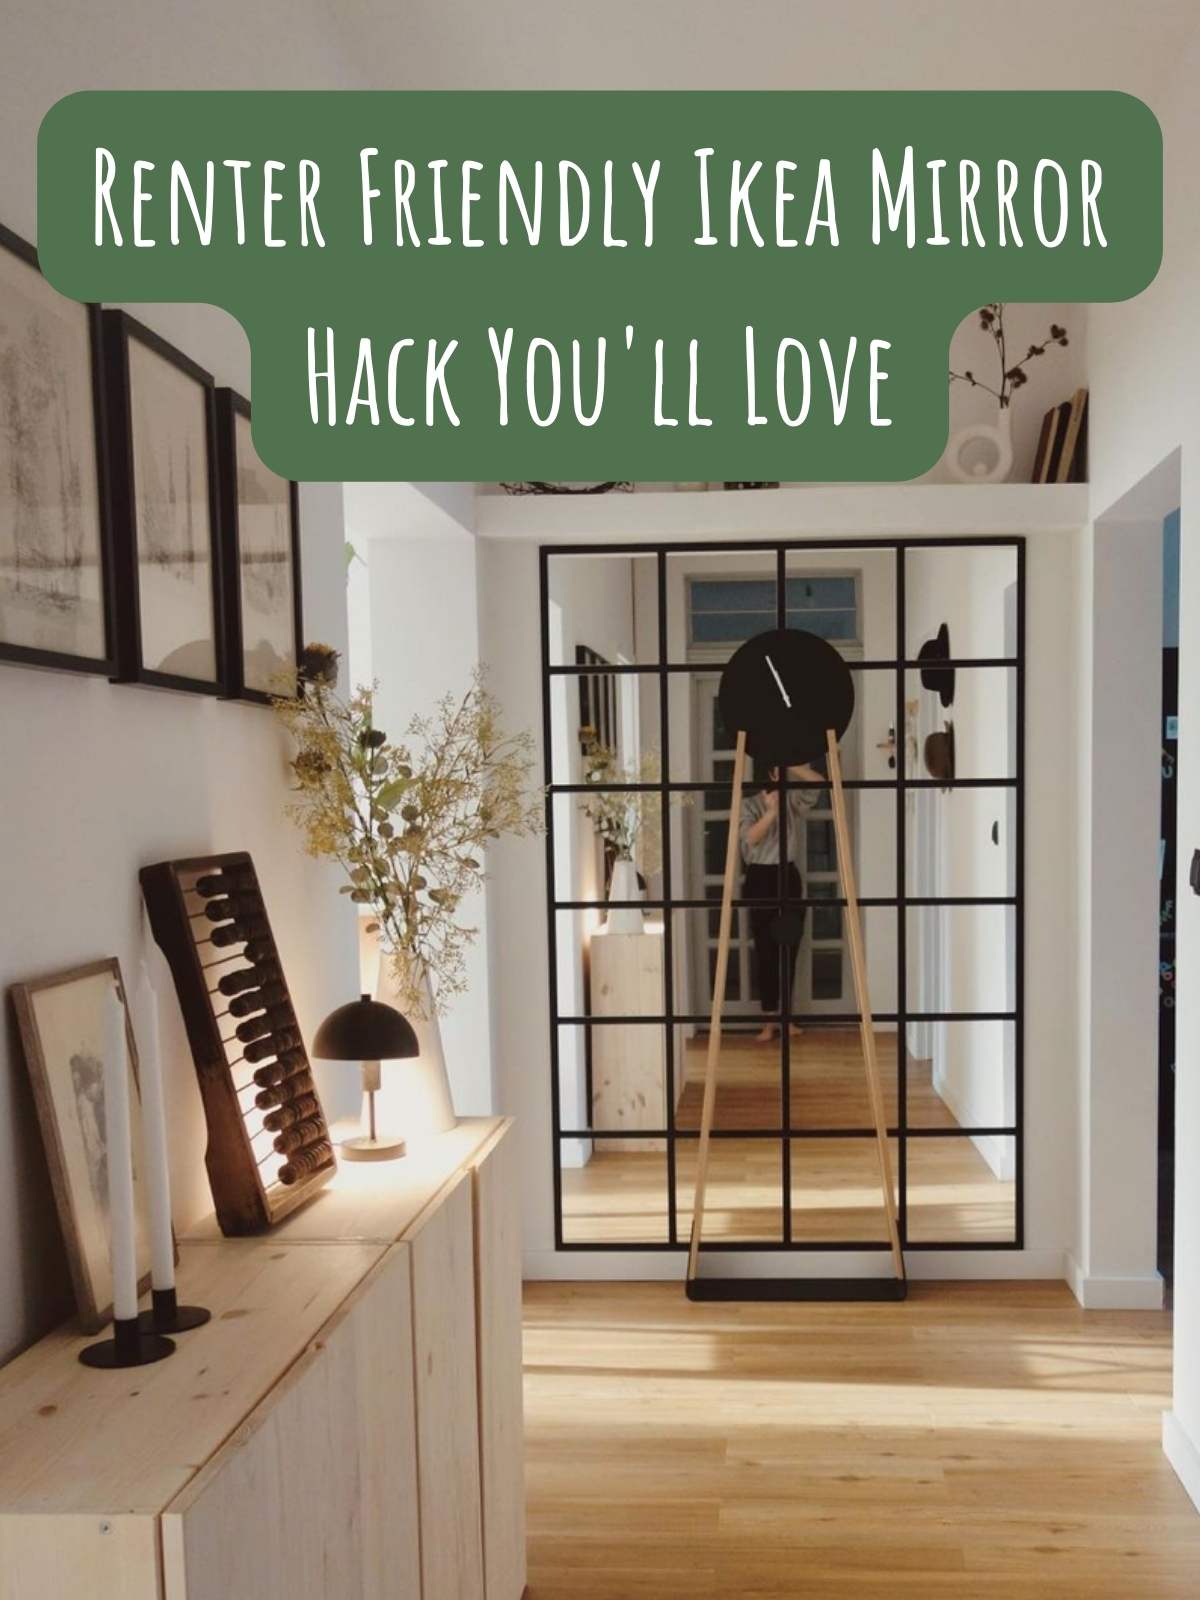
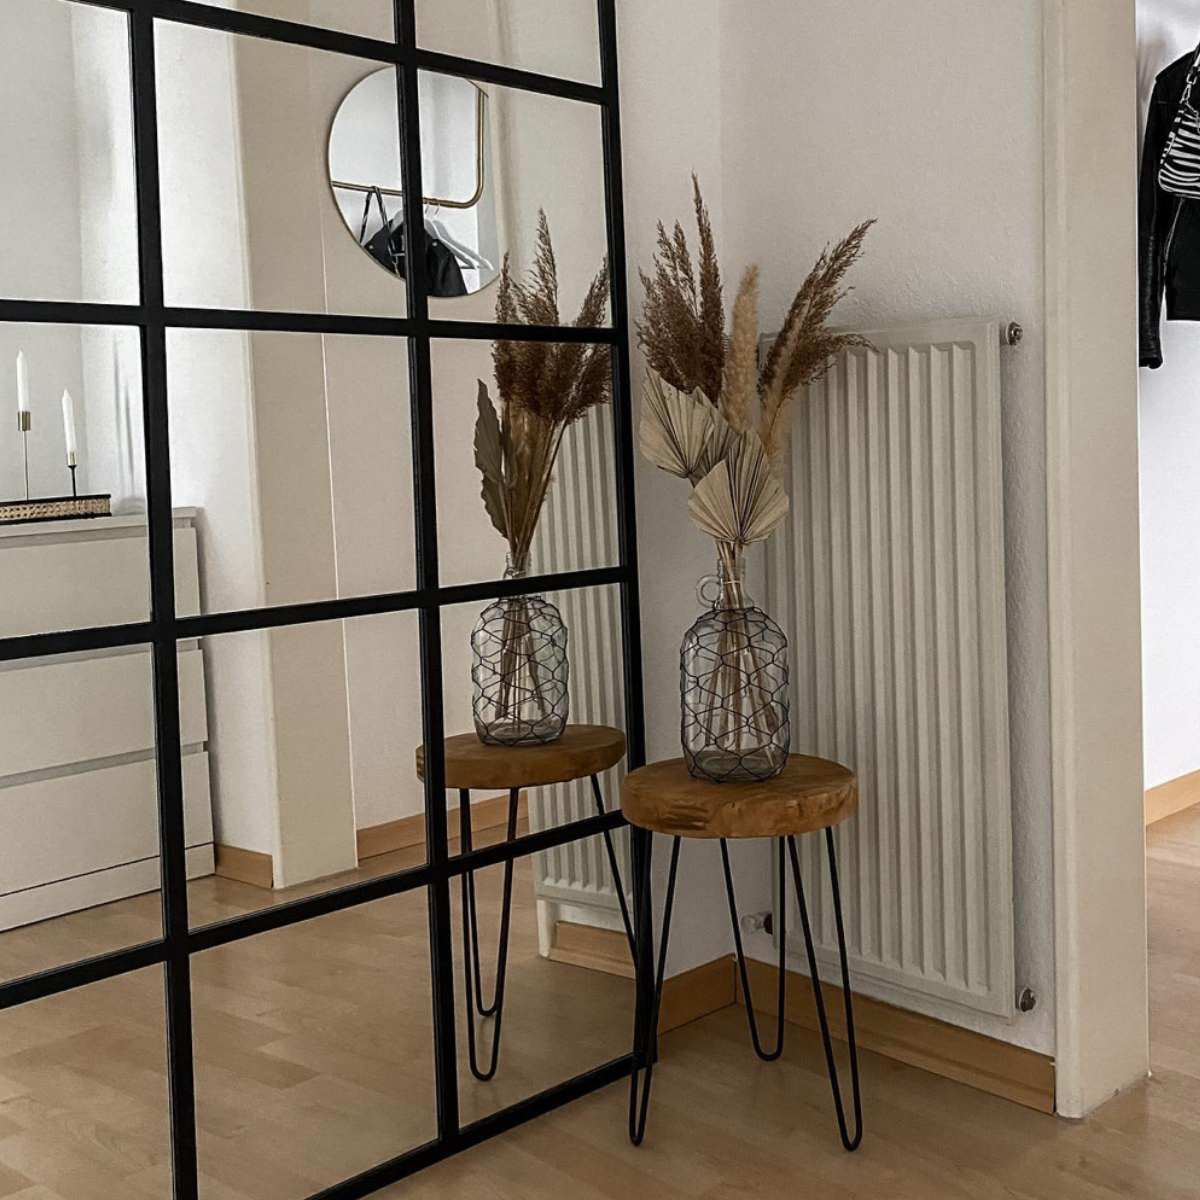
You know the one: Thin black trim with smaller square windows all lined up to look like on big window. Adding one of these to your home will trick the eye into thinking you have a whole other room! It will also add a whole bunch of light, so I see so reason not to dive into this DIY right now! It’s even renter friendly!
I have a list of supplies that you will need to buy, but first, I thought I would give you an idea of the kind of mirror we are going for. Take a look at the list below to get excited about this craft!
Table of Contents
Ikea Mirror Hacks Inspiration
There are many subtle differences in these examples that I think you would benefit from seeing. It will give you an insider look into the style that you really want. I know they may seem like small differences, but in reality, they make a world of difference. Take a look, the crafting starts here!
3. Huge Industrial Mirror Idea
4. Industrial mirror Styled Boho
6. Ikea Mirror with Thicker Boarder
Renter Friendly Ikea Mirror Hack You’ll Love
As someone who is renting right now, I know the struggles that come along with it. You have to pay most of an huge amount of money to your landlords every month, and you don’t even get to change things about the house.
No painting, no new tiles, nothing. That is why I love this Ikea Mirror Hack so much, it gives you the opportunity to transform your home in a renter-friendly way.
Supplies
There are many different ways that I have seen this hack done, but this way will be the best. Not only because the result is amazing but because it gives you the most room to make this your own. You get to choose things like border thickness, color, and so on.
For the sake of my DIY, I am going to walk you through the sizes and colors of the classic IKEA mirror, so if you know you want to make it different, adjust your sizing. For example, we will be using duck tape to make the black borders, so if you want it thinner or thicker, either cut the tape or position it so that it’s more covered.
I will say this: When you are choosing a color, go for darker ones. This contrast really plays an important role because it makes it look like an industrial window. At the end of the day, it’s up to you.
What You’ll Need:
- Matte Black Duct Tape – I feel like this duct tape really changed the game for me because it’s matte. Otherwise, you have a glossy finish on your border, which looks fine, but this is much better!
- Laser Level – Trust me when I say this is a solid investment. Not only will this make this project much easier, but you are going to make any project you have in the future easier.
- 12 Pack of Mirrors – I know these are not Ikea brand, but they are much cheaper. This pack of 12 good-quality mirrors is less than $50! I think we are going for savings here, not brand awareness.
- Measuring Tape
- Pencil
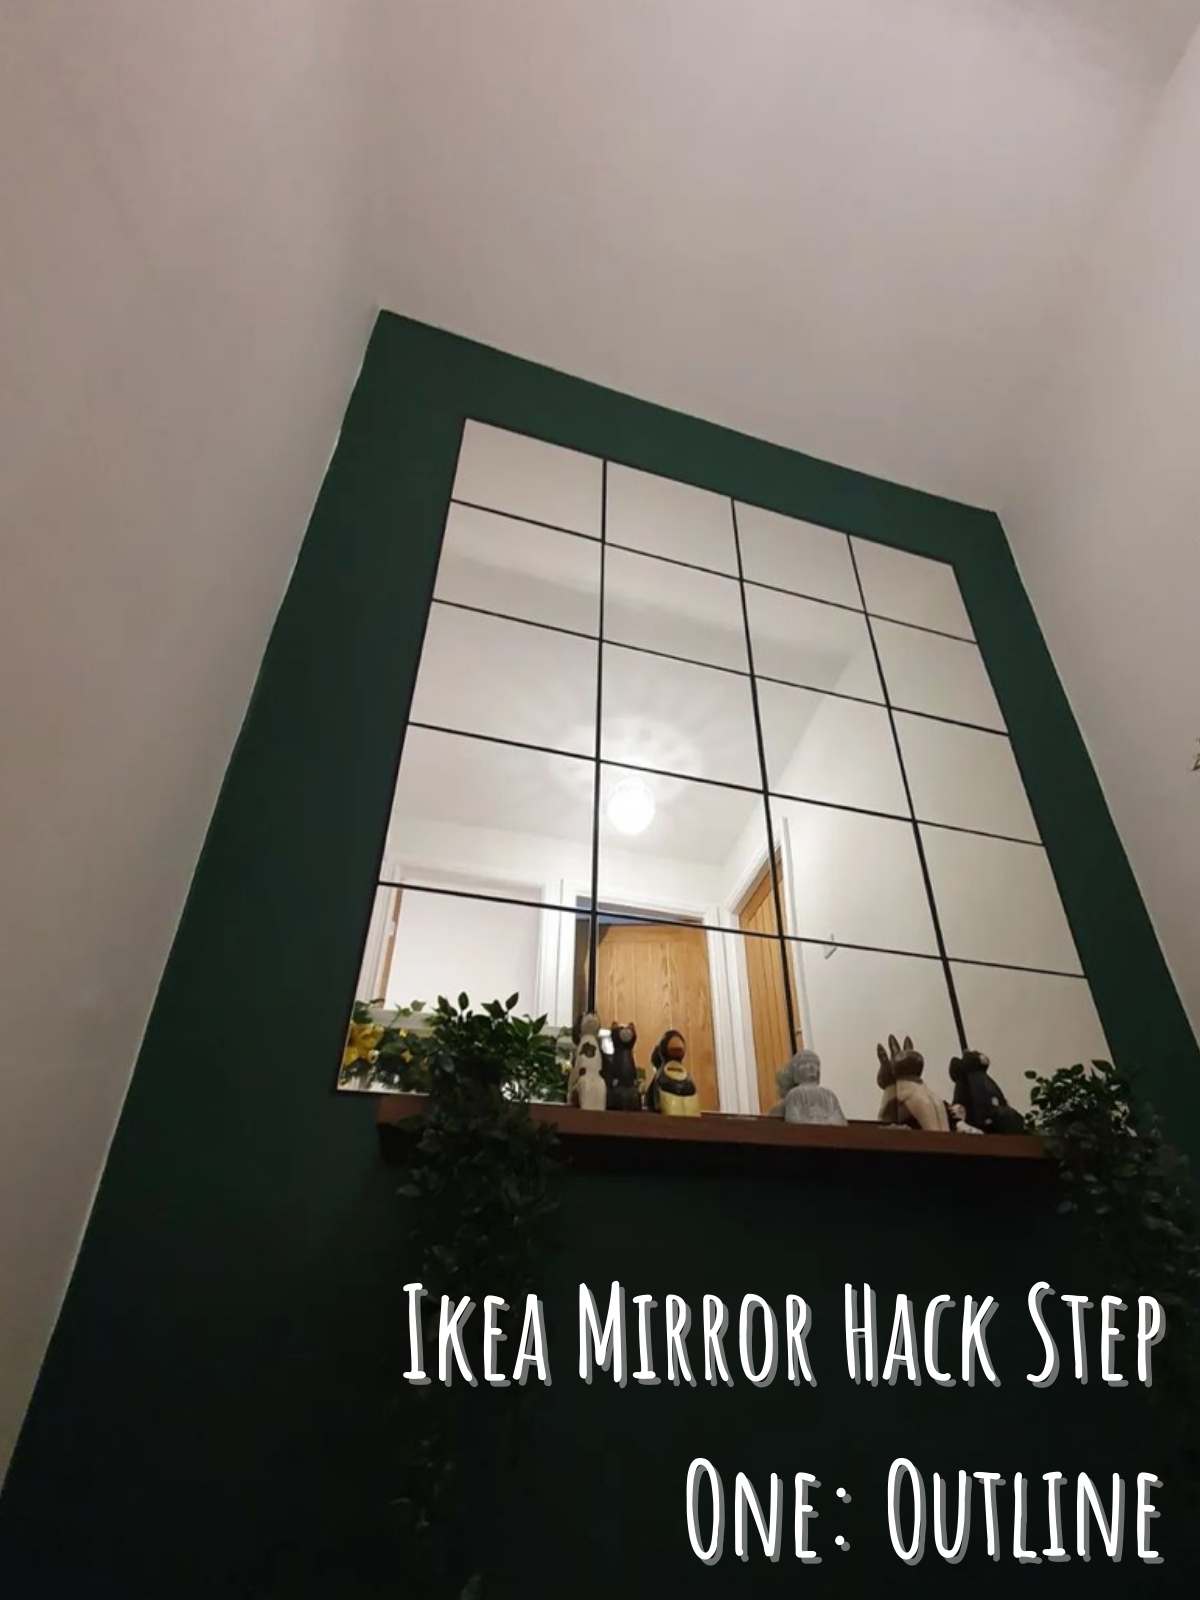
Ikea Mirror Hack Step One: Outline
It’s time to break out your handy dandy laser level! to start, you are going to want to make your outline with a pencil; that way, you know exactly where to put to tape. Like I said before, the spacing and sizing is up to you. For me, I wanted to use all 12 mirrors.
So I measured 53 Inches across and 40 Inches in height. I did this because those mirrors are 12 by 12 inches, and I wanted one-inch borders around them. Once you have your outer outline, it’s time to make the inner ones.
You’re going to want to measure and make a notch every 12 inches going inwards. You are marking where your inner borders will be. There should be 3 going down and 2 going across. Make your marks!
Ikea Mirror Hack Step Two: Apply The Tape
I think the best thing about this DIY is that when it’s time for your to move out, all you have to do is peel this sucker off and you are all good to go! Now it is time to apply those borders. You may have to go slow with this one because it’s easy to make the tape go crooked, but I know you’ve got this.
I recommend starting from the top and working your way down. The trick here is to get as few air pockets as possible; that way, it looks super real. But if you do get an air pocket or 12, don’t worry. Just take a pin and prick the bubble, slowly squeeze out the air, and you are good as gold!
Ikea Mirror Hack Step Three: Time for Mirrors
This was the most exciting step for me because this was when I got to see my mirror truly come together. Your mirrors should have come with little adhesive strips for each one. If by some chance it didn’t, you can always make a run to your nearest Walmart; they should have adhesive wall strips!
Apply your adhesive strips either to the wall first or the mirror. Normally I do the mirror first, but I tried it differently this time, and it was much easier! I was able to put the strips in the exact same spot on every mirror, and it felt like less work in the long run. I know this DIY can feel tedious at times, so any minute saved is worth it.
Take your time sticking your mirrors onto the wall. Make sure to hold each one for 15-30 seconds firmly; that way, they are really sticking. Nothing worse than a broken mirror! You want this DIY to bring happiness to your home, not bad luck.
Take a step back and admire your new mirror. You’ve done it! This Ikea mirror hack is such an awesome way to save money. The industrial mirror that we are making a dupe for can run up to $700 dollars for big ones, so I think we have saved ourselves quite a lot of money. And don’t we all just love that? Especially when the end result looks the same.
I think DIYs are so important because it gives us an outlet for creative expression. As we’ve seen, they also have the ability to save us money, and lots of it!
If you loved this DIY and are itching to try your hand at more of them, then you need to check out some of my other ideas! I have too many, to be honest, so I am happy to share these with you! Take a look to see which ones are up your alley!