
Inside: Easy and affordable crescent moon wreath DIY you’ll love.
Crafting is one of my biggest passions in life, along with many other things, including; spending time in nature, trying new teas, and learning about the moon. So I thought today I could combine 2 of my passions together and craft a crescent moon wreath!
The crescent moon is a reminder of what you want to bring into or out of your life, depending on the phase it’s in. Waxing moons(these happen right after the new moon) are a reminder for you to set your intentions for the month ahead. The waning crescent moons are a call to think about what you can release that is no longer serving you.
I think this symbolism is beautiful, and having a decor piece on your wall acts as a wonderful reminder of its wisdom. Today I have created the ultimate crescent moon wreath DIY that you will absolutely love. I included some ideas for inspiration, a list of the supplies you’ll need, and step-by-step instructions. Let’s dive into this adorable craft!
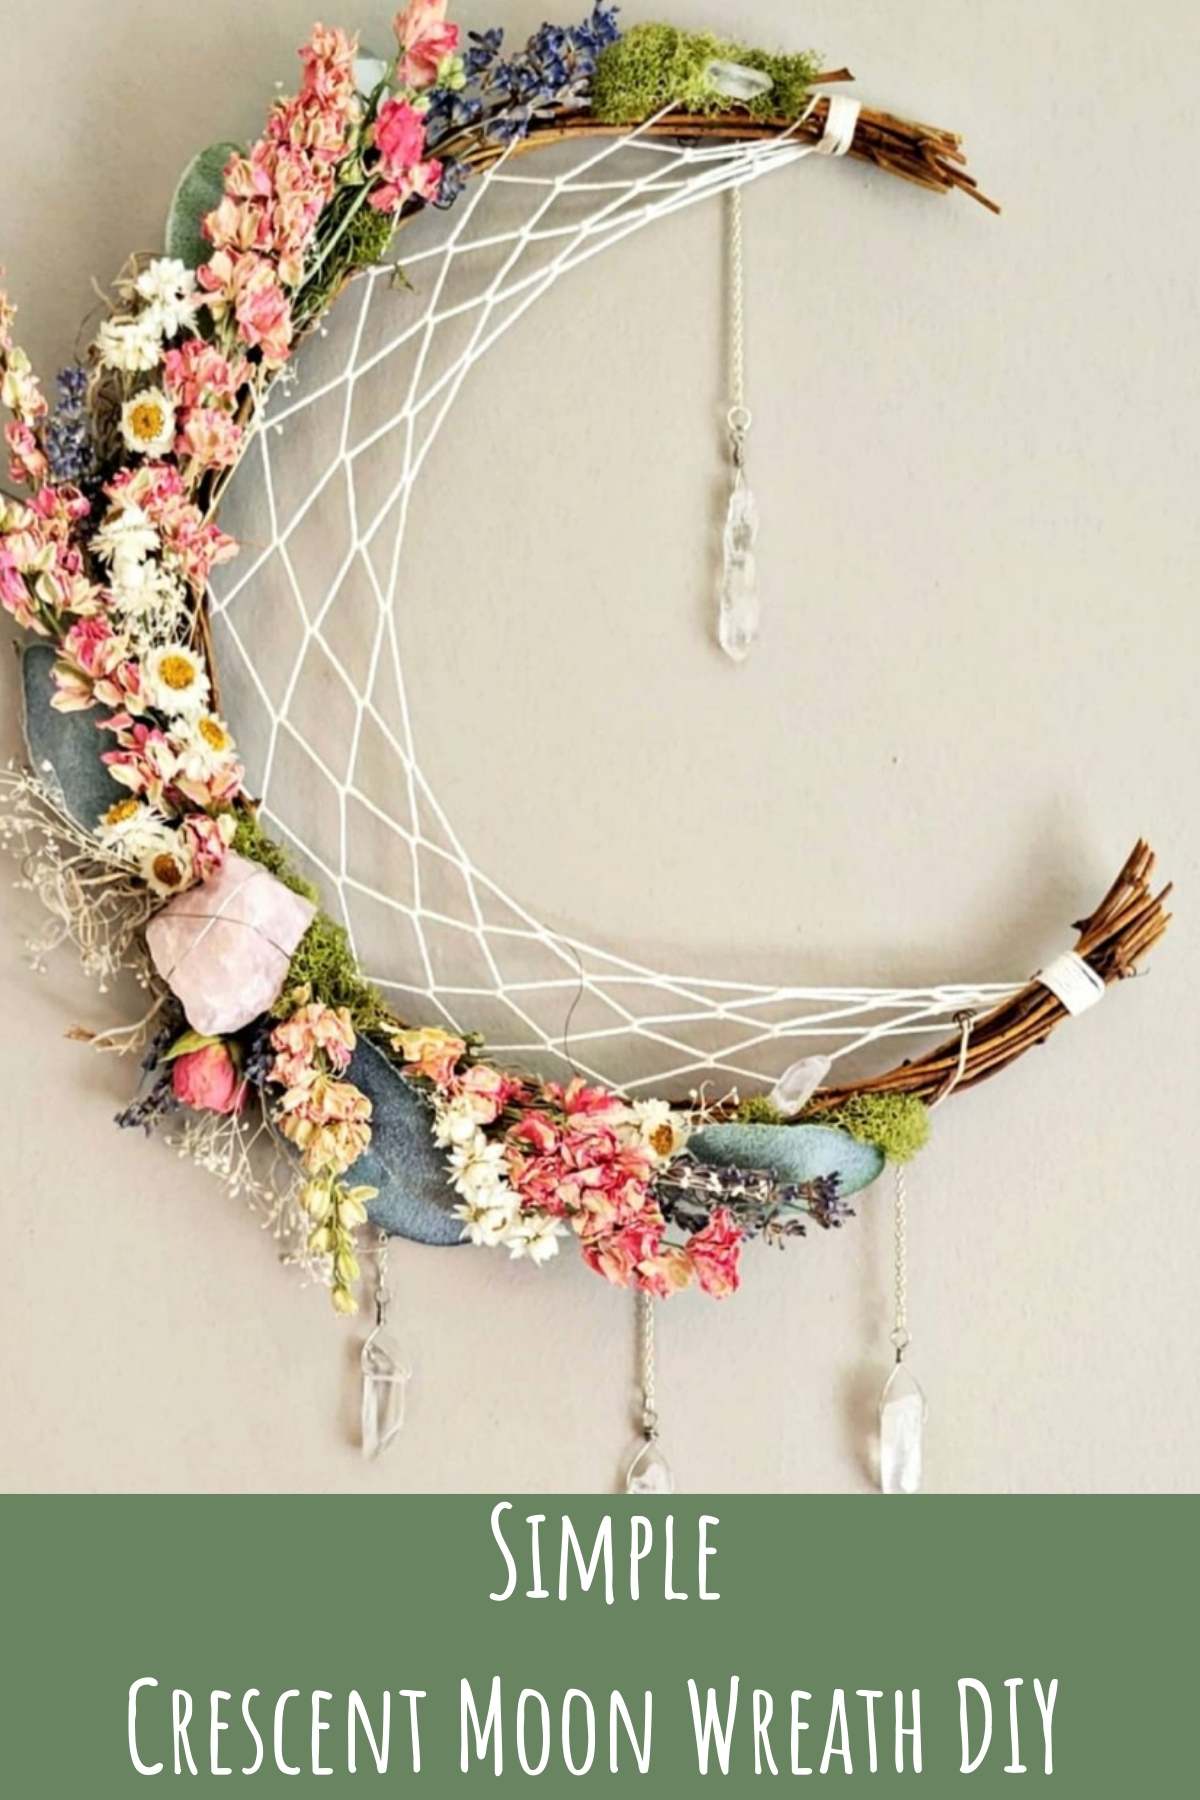
Table of Contents
Moon Wreath DIY Inspiration
In order to properly make your own Moon Wreath, you need some inspiration. I love looking at all of the amazing ways that people around the world have chosen to decorate their wreaths; it gives me such a spark for my own creations that I just had to share this with you. Take a look at this little list to get started.
1. Floral Spring Moon – I love the use of flowers in this wreath. It’s too cute! Take a look to see what I mean.
2. Green Wooden Moon with String – This person painted their base form a perfect shade of green. If you don’t want your wreath to have lots of moss, then this is a good way to fix it.
3. Floral Dream Catcher – Dream catchers are really beautiful, and you can make them easier than you think.
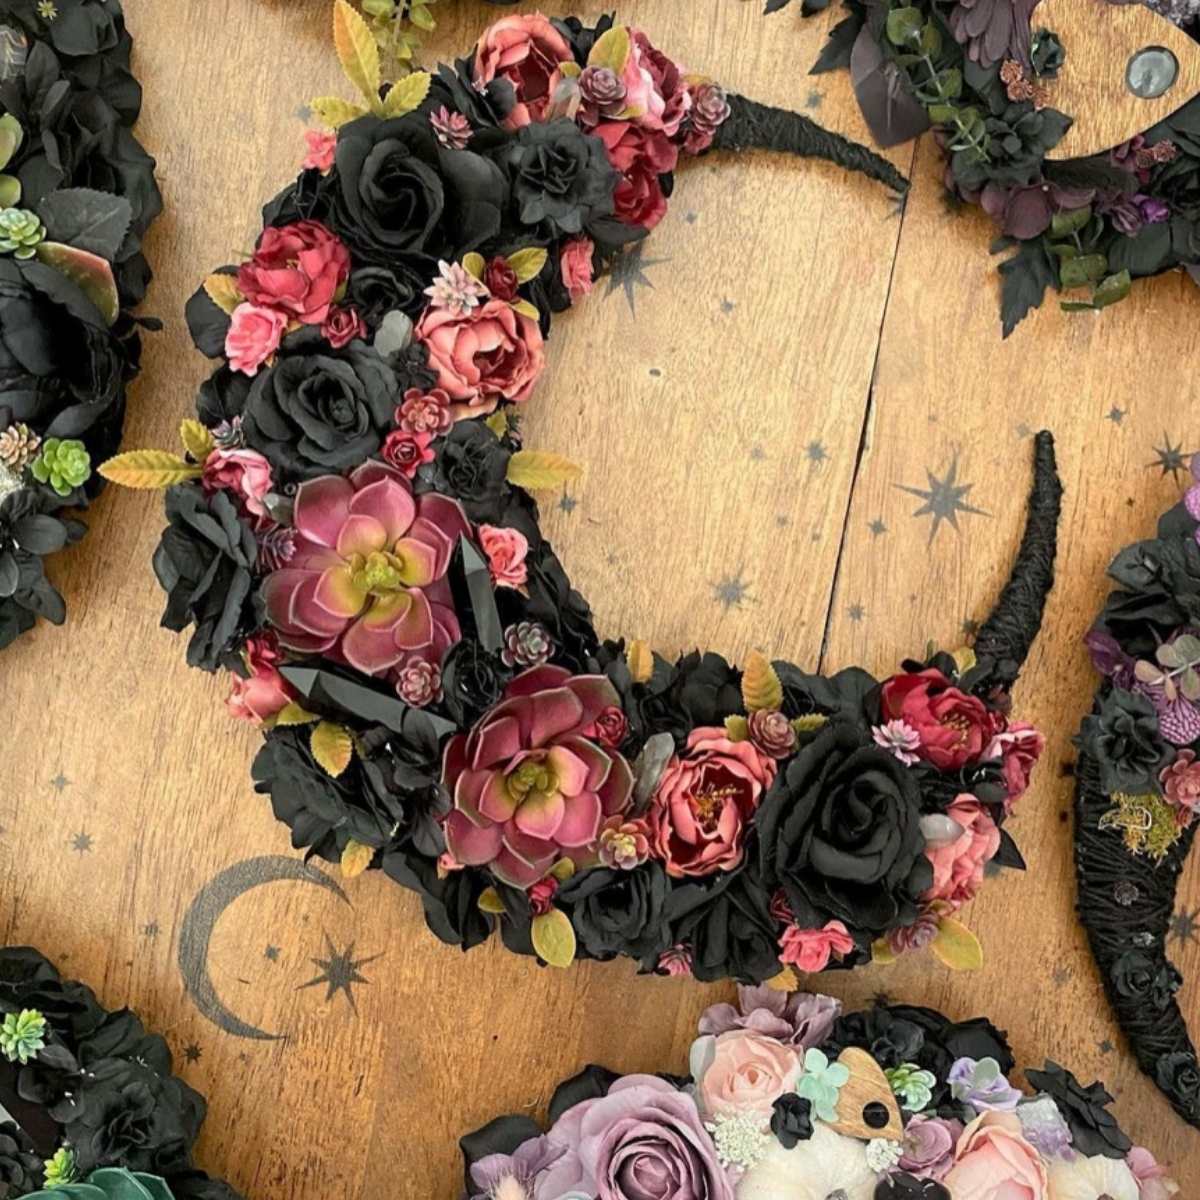
4. Dark Flower Moon – If your house radiates a darker comforting vibe, then this might be the moon for you. Check out this idea.
5. Cute Hanging Crystals – I love the idea of adding a hanging crystal. It just makes the moon feel that much more magical, don’t you think?

6. Light Moss Crescent – This wreath uses lighter moss. This is an option that you have; there are bright greens, darker browns, so many different kinds of moss to choose from!
7. Spring Flower Moon with Cute Moss – I love this because it feels like it belongs in a little cottage.
8. White Flower Crescent Moon – White florals are some of my favorites. They add so much lightness to a space.
9. Fern Moon Idea – I think this one is a real winner; whoever made this is so talented! If you loved this, try and make your own version of it!
10. Fresh Moss Moon Idea – This moss looks like it’s growing right out of this wreath.
11. Big Floral Wreath with Little Jar of Flowers – I love the addition of the little jar.

This Crescent moon wreath made by The Ever Bloom Garden is a great inspiration for making your own. Or head to her shop to buy a similar one and save the effort!
Simple Crescent Moon DIY
Now that you have gotten some inspiration, I think we are ready to jump into the DIY portion of this article. This is what I’ve been waiting for! I am going to be creating my own moss crescent moon for this craft, but keep in mind that you can create whatever you want. You don’t have to follow along exactly.
I am just giving you the foundations that you can build your wreath upon. So it’s pretty basic stuff, I want you to be able to take this and run with it. Make it your own!
Step One: Gather Your Supplies
As I said above, this list is the basis of supplies that you are going to need for this DIY. You can and should add more little decorations to your cart to help make your moon wreath DIY that much cuter! So take a look at this list and get to shopping!
- Wooden Crescent Moon Wreath Form
- Bag of Moss
- Brown Moss
- Sheet Moss
- Twine
- Hanging Crystal
- Dried Flowers
- Scissors
- Hot Glue
Step Two: Prepare to Craft
Next up, we have to prepare our crafts. I like to craft the same way that the french like to cook: Before you begin, you lay out all of your ingredients in front of you, so you know where everything is at. So get everything ready.
Once you do this, you can envision how you want your end result will look. You can even place everything onto the form in the same way you will when it’s time to glue it on. This way, you get a good idea of what it will look like and if there are any changes that you’ll have to make before you glue everything.
Step Three: Get to Gluing.
The next step is my favorite. You get to start gluing! I’ll explain my method. With these moss crafts, you always want an even layer of moss to go down first. So I take my little pieces and carefully glue them to the board without hurting my fingers, gently pressing for about 5 seconds. I do this all around, but I put less around the top and bottom tips.
I will be adding a string to that area. After I finish covering the base area with moss, I like to press all around to make sure everything is even firmly. If you like, this is your moment to add more moss to different areas to make it look like it’s growing naturally.
Step Four: Tying the String
So for this craft, I will be securing the twine tightly around the tips of the moon. To do this, put a bead of hot glue on the tip and then put the end of your string on it. Firmly hold for 10 seconds, then apply more hot glue right nxt to the string that you are holding. Wrap the twine around tightly and hold for 5 seconds.
Repeat this process for however long until the space is covered to your desired length.
Step Five: Finishing Touches
Now is your moment to personalize it however much you want. Take your time, and make sure that any decoration is firmly fastened to the wreath. That’s it! You have created a Crescent Moon Wreath DIY.
Conclusion
Take a step back; how do you feel about your wreath? Proud, I hope! You can’t really go wrong with a moon-shaped wreath; they are all adorable! Personally, I am a bit of a perfectionist so if you aren’t fully happy with how it turned out…take a 5-minute break. Be nicer to yourself, and then come back and look at it again; I bet your idea will have changed. It’s beautiful!
Making wreaths is one of my top hobbies, so I love to share the process with you. It’s a lot easier than people may think. Many companies charge an arm and a leg for one, so it’s actually very useful to be able to know how to make your own. You could save hundreds of dollars. No joke!
If you are interested in continuing this crafting session, I have plenty of other DIYs for you to try. Remember that no one starts out good at something; you have to work on it. So work on it with these.